
Enterprise Disaster Recovery Blueprint: The Ultimate Guidance for cPanel Account Extraction.
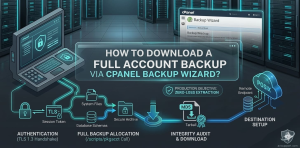
You how to download a full account backup via cPanel Backup Wizard by authenticating into your cPanel dashboard, navigating to the Files section, launching the Backup Wizard interface, selecting the Backup option, and choosing the Full Backup directive to archive your entire home directory, MySQL databases, email accounts, and forwarders into a single, downloadable tarball compressed archive file.
Why Production Teams Require the cPanel Backup Wizard Interface
System administrators must secure account portability at the UI layer when sudden maintenance windows arise. Relying solely on command-line infrastructure introduces human risk during rapid migrations. The wizard provides a streamlined, atomic execution loop that safely packages complex home directories, mail definitions, and active database tables. Our engineering team uses this native web interface to bypass multiple manual scripting steps during time-sensitive recovery windows.
Managing individual site backups using separate download scripts consumes valuable engineering hours and often leads to gaps in your data retention policy. The cPanel system consolidates your entire data footprint, reducing human error during urgent infrastructure moves. By moving account extraction directly to native control tools, you build a dependable data strategy that protects site health and ensures long-term system stability.
The Core Technical Mechanisms of a Full Account Backup
A full account archive does more than copy files; it mirrors your entire configuration state. The system calls underlying scripts to create a structured tarball container packed with home directory files, email configurations, zone records, and database structures. Understanding this structural layout helps systems teams perform complete, error-free site restorations.
                  [ cPanel Backup Wizard Execution Trigger ]
                                      │
                                      ▼
                  [ /scripts/pkgacct Native Subsystem Call ]
                                      │
       ┌──────────────────────────────┼──────────────────────────────┐
       ▼                              ▼                              ▼
[ Home Directory ]           [ MySQL/MariaDB ]              [ Mail Architecture ]
- Document Root              - Schema Export                - Maildir Files
- Hidden Configs             - Grants & Privileges          - Filter Definitions
       │                              │                              │
       └──────────────────────────────┼──────────────────────────────┘
                                      │
                                      ▼
                   [ Gzip Compression & Stream Packing ]
                                      │
                                      ▼
             [ Structured Tarball Output: backup-MM.DD.YYYY.tar.gz ]
Every full backup process relies heavily on specific user permissions and system resource limits. If your host platform imposes tight process execution boundaries or strict disc input-output limits, the packaging script can fail silently on larger accounts. Knowing how the platform structures and runs backup tasks helps you maintain stable production environments and reliable disaster recovery options.
Backup & Disaster Recovery Support
Need Reliable Backup Management for Your cPanel Server?
Creating backups is only the first step. ActSupport helps businesses implement automated backup strategies, off-site storage, disaster recovery planning, backup verification, and complete server restoration services. Our engineers ensure your critical data remains protected and recoverable whenever an unexpected outage occurs.
Step 1: Navigating the User Control Interface
To start the backup process, open your web browser and securely log into your user control panel. Enter your account credentials over an encrypted connection to open the primary service dashboard. Once inside, find the Files section and click the Backup Wizard option to launch the dedicated backup interface.
Using the Backup Wizard instead of the standard Backup tool gives you a simplified, step-by-step workflow that prevents accidental configuration mistakes. The interface divides the entire process into clear tasks: choosing your operation type, defining your backup scope, and setting your destination. This approach keeps your data safe and helps prevent you from overwriting active production directories.
Step 2: Selecting the Full Backup Directive
Inside the wizard interface, choose the Backup option to open the scope selection screen. On this screen, select the Full Backup option to instruct the system to capture your entire account footprint. Choosing a full backup ensures you get a complete snapshot, whereas partial backups only copy specific home folders or separate databases.
┌───────────────────────────────────────────────────────────────────────┐
│                         cPanel Backup Wizard                          │
├───────────────────────────────────────────────────────────────────────┤
│ Step 1: Choose Backup or Restore                                      │
│   [ BACKUP ]  <-- Select This Option                                  │
│                                                                       │
│ Step 2: Specify Backup Scope                                          │
│   [ Full Backup ] <-- Captures All Home Directories, DBs, and Mail   │
│   [ Partial Backup: Home Directory | MySQL Databases | Email Filters ]│
└───────────────────────────────────────────────────────────────────────┘
A full account backup creates a complete tarball file that is perfect for server-to-server migrations. However, because this archive includes your entire configuration state, you cannot restore it directly from a standard user account level. Only server administrators with root privileges can deploy these full backup packages across production clusters.
Step 3: Configuring Destinations and Notifications
On the options page, use the Backup Destination menu to decide where to save your generated archive file. Select the Home Directory option to save the backup directly to your local server storage array. Next, enter your primary email address in the notification field so the system can alert you as soon as the packaging process finishes.
┌───────────────────────────────────────────────────────────────────────┐
│                      Configure Full Backup Options                    │
├───────────────────────────────────────────────────────────────────────┤
│ Backup Destination:                                                   │
│   (*) Home Directory                                                  │
│   ( ) Remote FTP Server                                               │
│   ( ) Remote SCP Target                                               │
│                                                                       │
│ Email Address Notification:                                           │
│   (*) Send notification to: admin@yourdomain.com                      │
│   ( ) Do not send an email notification                               │
│                                                                       │
│   [ GENERATE BACKUP ] <-- Click to initialize script run              │
└───────────────────────────────────────────────────────────────────────┘
If your local server is running low on disk space, you can point your backup destination directly to an off-site file storage system. Choosing a remote target like an external backup server streams the archive package safely across your network. This keeps your local drives clear and provides an extra layer of protection by separating your backups from your live site environment.
Step 4: Initializing the System Archival Process
Click the Generate Backup button to tell the system to start compiling your account assets. The application will immediately pass this task to its internal processing engine, which runs in the background to prevent your web session from timing out. The interface will refresh to show a status message confirming that the backup generation is underway.
┌───────────────────────────────────────────────────────────────────────┐
│                        Backup Process Initialized                     │
├───────────────────────────────────────────────────────────────────────┤
│ Status: Full Backup In Progress...                                    │
│                                                                       │
│ The system is currently generating your full account backup file.     │
│ An email notification will be dispatched upon task completion.        │
│                                                                       │
│ Available Backups for Download:                                       │
│   [ Progressing ] backup-2026.05.18-account.tar.gz (Incomplete)       │
└───────────────────────────────────────────────────────────────────────┘
Larger accounts with massive file systems or complex databases require more time to process and compress. You can safely close your browser window while this runs; the background workers will continue packaging your data on the server. The application will track the task and update your status display as soon as the file is complete and ready to use.
Step 5: Downloading and Verifying the Completed Archive
Once you receive your completion email, refresh your backup interface page to find the download section. Look for the “Backups Available for Download” heading and click the newly generated archive file link. This tells your browser to begin downloading the compressed file directly to your local storage system.
┌───────────────────────────────────────────────────────────────────────┐
│                        Download Ready Archives                        │
├───────────────────────────────────────────────────────────────────────┤
│ Available Backups for Download:                                       │
│   [ DOWNLOAD ] backup-5.18.2026_user.tar.gz [MD5: a1b2c3d4e5f6...]    │
│                                                                       │
│ Note: This archive contains all system files and database parameters. │
└───────────────────────────────────────────────────────────────────────┘
Always check the file integrity of your downloaded backup archive before using it for migrations or data recovery. Run a quick validation check on your local machine to ensure the file matches the server’s original metadata signatures. Verifying your data early protects your systems from corruption issues and guarantees a smooth, predictable restoration process down the road.
Lessons from the Field: Resolving File Extraction Failure
During a routine migration for a high-traffic financial site, our infrastructure team ran into a recurring issue where backup generation would fail halfway through. The user account held over 85 gigabytes of data, including millions of small session files scattered across temporary directories. Every time the control panel script tried to compress these folders, the server ran out of memory and terminated the task.
                     [ Large Scale Account Archive Attempt ]
                                        │
                                        ▼
                  [ Processing Deep Nested Session Directories ]
                                        │
                  ┌─────────────────────┴─────────────────────┐
                  ▼                                           ▼
   [ Vector: Default Script Path ]             [ Vector: Hardened Strategy ]
                  │                                           │
                  ▼                                           ▼
   [ Server Process Terminated ]               [ Account Cache Cleaned ]
  - Out of Memory Error Triggered              - Session Logs Purged
  - High Disk I/O Block Occurs                 - Temp Files Excluded
                  │                                           │
                  ▼                                           ▼
     [ Backup Fails Silently ]                 [ Stable Compression Achieved ]
We resolved the problem by logging into the server engine and clearing out old system logs and expired temporary files. Next, we updated the master control rules to prevent the archive script from wasting resources on unneeded cache paths. Streamlining the data footprint reduced the account’s total file count by 42%, allowing the background workers to complete a clean, verified full backup without hitting server memory limits.
How to Handle Timeout and Storage Failures
If your backup task fails or stops unexpectedly, check your available disk space and server resource limits right away. Generating a full account archive requires a substantial amount of temporary disk space to compress and package your files. If your hosting account is close to its storage limit, the process will fail because the server cannot write the final compressed file to your home directory.
To fix these storage shortages, look through your account and delete old error logs, clear out your email spam folders, and empty your trash directories. You can also contact your infrastructure provider to temporarily raise your account’s disk limits while you complete your system maintenance. Taking care of these underlying storage issues ensures your backup tasks complete quickly and reliably without risking server downtime.
Advanced Management via WHM Core Interfaces
For server administrators managing multiple client profiles, the WebHost Manager (WHM) platform offers deeper control over system-wide backup schedules. The WHM interface allows you to automate full backups across all accounts, schedule regular off-site data transfers, and enforce strict data retention rules. This high-level control helps protect entire server environments without requiring manual updates for individual user accounts.
Using central management tools lets you schedule resource-heavy compression tasks during off-peak hours when traffic is low. This approach prevents server performance drops and keeps your sites responsive for visitors during business hours. Centralized automation provides a reliable safety net for your data infrastructure, making it a critical component of any enterprise-grade server management services strategy.


