

- 1. Sign in to the Route 53 console, and select Hosted Zones from the navigation pane on the left.
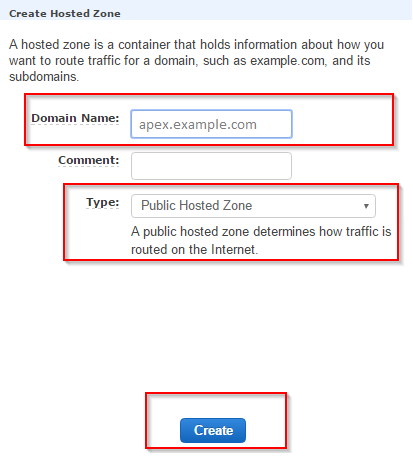
- 2. Choose Create Hosted Zone.
- 3. Enter the following information into the corresponding fields:
- For Domain Name, type your domain name; for example, “apex.example.com”.
- For Comment, type text that describes what the subdomain does or is for.
- For Type, choose Public.
- Choose Create.
- Route 53 console will create the subdomain. Choose your newly created hosted zone, find the record with type NS, and take note of the four AWS name servers in the Value column.
Next, create a new record set under your parent domain that points to your subdomain:
- 1. From the left navigation pane, choose Hosted Zones, and then select the name of the hosted zone for your parent domain: “example.com”.
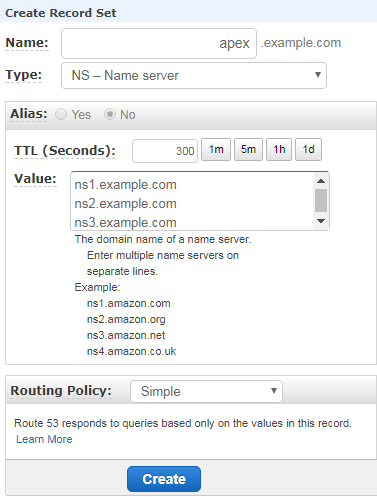
- 2. Choose Create Record Set, and enter the following information:
- 3. For Name, type your preferred subdomain name. For example, if the subdomain you’re attempting to create is “apex.example.com”, type “apex”.
- For Type, choose NS – Name Server.
- For Value, type the four name server records on separate lines.
- You can leave all other values at their defaults.
- 4. Choose Create.
You can then create resource records on your subdomain’s hosted zone to route to various AWS resources, or to non-AWS targets of your choice.
If you feel this is tricky and you can’t take any risk, our Web Hosting experts can assist you in getting this fixed at a pocket-friendly price. All you need to do is to contact us and we’ll take care of the rest.
To get updates follow us on Facebook, Twitter, LinkedIn


